.: Rock Candy
How To Make Your Own Rock Candy
Making your own rock candy is a fun and tasty way to grow crystals and see the structure of sugar on a big scale. Sugar crystals in granulated sugar display a monoclinic form, but you can see the shape much better in homegrown large crystals. This recipe is for rock candy that you can eat. You can color and flavor the candy, too
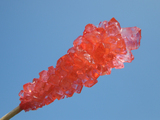
Here's a stick of red rock candy. It's easy to grow these sugar crystals yourself, in any color or flavor you like.
Rock Candy Materials
- 3 cups sugar (sucrose)
- 1 cup water
- clean glass jar
- cotton string
- pencil or knife
- food coloring (optional)
- 1/2 tsp to 1 tsp flavoring oil or extract (optional)
- Lifesaver candy (optional)
- pan
- stove or microwave
Make Rock Candy
- Pour the sugar and water into the pan.
- Heat the mixture to a boil, stirring constantly. You want the sugar solution to hit boiling, but not get hotter or cook too long. If you overheat the sugar solution you'll make hard candy, which is nice, but not what we're going for here.
- Stir the solution until all the sugar has dissolved. The liquid will be clear or straw-colored, without any sparkly sugar. If you can get even more sugar to dissolve, that's good, too.
- If desired, you can add food coloring and flavoring to the solution. Mint, cinnamon, or lemon extract are good flavorings to try. Squeezing the juice from a lemon, orange, or lime is a way to give the crystals natural flavor, but the acid and other sugars in the juice may slow your crystal formation.
- Set the pot of sugar syrup in the refrigerator to cool. You want the liquid to be about 50 degrees F (slightly cooler than room temperature). Sugar becomes less soluble as it cools, so chilling the mixture will make it so there is less chance of accidentally dissolving sugar you are about to coat on your string.
- While the sugar solution is cooling, prepare your string. You are using cotton string because it is rough and non-toxic. Tie the string to a pencil, knife, or other object that can rest across the top of the jar. You want the string to hang into the jar, but not touch the sides or bottom.
- You don't want to weight your string with anything toxic, so rather than use a metal object, you can tie a Lifesaver to the bottom of the string.
- Whether you are using the Lifesaver or not, you want to 'seed' the string with crystals so that the rock candy will form on the string rather than on the sides and bottom of the jar. There are two easy ways to do this. One is to dampen the string with a little of the syrup you just made and dip the string in sugar. Another option is to soak the string in the syrup and then hang it to dry, which will cause crystals to form naturally (this method produces 'chunkier' rock candy crystals).
- Once your solution has cooled, pour it into the clean jar. Suspend the seeded string in the liquid. Set the jar somewhere quiet. You can cover the jar with a paper towel or coffee filter to keep the solution clean.
- Check on your crystals, but don't disturb them. You can remove them to dry and eat when you are satisfied with the size of your rock candy. Ideally you want to allow the crystals to grow for 3-7 days.
- You can help your crystals grow by removing (and eating) any sugar 'crust' that forms on top of the liquid. If you notice a lot of crystals forming on the sides and bottom of the container and not on your string, remove your string and set it aside. Pour the crystallized solution into a saucepan and boil/cool it (just like when you make the solution). Add it to a clean jar and suspend your growing rock candy crystals. You can check out this wikiHow visual material for making rock candy if you would like to see what to expect.
Sugar crystals or rock candy are among the safest crystals to grow (you can eat them!), but they aren't always the easiest crystals to grow. If you live in a humid or warm climate, you may need a little extra advice to get things going.
There are two techniques for growing sugar crystals. The most common one involves making a saturated sugar solution, hanging a rough string in the liquid, and waiting for evaporation to concentrate the solution to the point where crystals start to form on the string. The saturated solution could be made by adding sugar to hot water until it starts to accumulate in the bottom of the container and then using the liquid (not the sugar at the bottom) as your crystal growing solution. This method tends to produce crystals over the course of a week or two. It fails if you live someplace where the air is so humid that evaporation is very slow or if you place the container in a location where the temperature fluctuates (like a sunny window sill) so that the sugar stays in solution.
If you have had problems with the simple method, here's what you need to do.
- Grow a seed crystal
The other way to get a seed crystal is to break one off from a piece of rock candy or other sugar crystal. Use a simple knot to tie the seed crystal onto some nylon line (don't use rough thread if you have a seed crystal). When you suspend the crystal in the solution you want it to be completely covered, yet not touching the sides or bottom of the container.
- Supersaturate your crystal solution
You need as much sugar as possible to dissolve into solution. Increasing the temperature dramatically increases the amount of sugar that will dissolve, so you can get a lot more sugar into boiling water than in hot tap water, for example. Boil the water and stir in more sugar than will dissolve. It's a good idea to pour the solution through a coffee filter to make sure no undissolved sugar remains in the crystal growing solution. You can use this solution as-is or you can let it evaporate for a day or so, until you see crystals start to form on the container. If you choose to evaporate off some of the liquid, reheat it and filter it before introducing the seed crystal.
- Cool the solution slowly.
Sugar becomes much less soluble as the temperature falls from boiling to room temperature or refrigerator temperature. You can use this characteristic to stimulate quick crystal growth. The 'trick' is to allow the solution to cool slowly because if a sugar solution cools very quickly it tends to become supersaturated. This means solutions that cool quickly will become highly concentrated rather than grow crystals. You can slow the cooling of your solution by setting the whole crystal growing container inside a pot of near-boiling water. Either seal the crystal growing container so that no water gets in or else make sure the sides of the crystal container are tall enough that water won't get inside. Let the whole setup slowly drop down to room temperature. Sugar crystals grow slowly so while you might see growth within a couple of hours, it could take a couple of days to be visible. Once the solution has slowly dropped to room temperature, you could continue to take it down to the temperature of the refrigerator (if the container will fit inside).
If you suspend a seed crystal in a sufficiently saturated solution, you may get crystal growth over a few hours by controlling the cooling of the solution. Therefore, even if you live someplace where you can use the evaporation method for growing sugar crystals, you may want to give this method a go.
Come join us on our Facebook Page
|